Corian Fab Overview
|
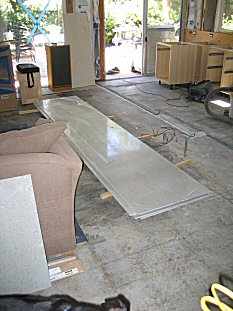
First you get the material. All the solid surfaces come as sheet goods, 30" wide X 12' long x 1/2" thick (and they are very heavy!) |
 |
 |
All the edges require long strips of the material. HERE we're cutting 1" strips from the edge of a sheet. Since the material is pretty floppy and we don't want to break it, we apply clamps behind the cut to support the strip until the cut is done. |
|
The undermount sink- one of the best reasons to have solid surface countertops! - Cut a hole in the plywood cabinet that's big enough for the sink. - Mark the underside of the sheet so you know exactly where it goes. - Flip the sheet over and position the sink exactly. Make sure the front and back are in the right places! - Apply stop blocks around the sink with hot glue - Apply the adhesive liberally around the sink flange and glue it on. The pros have clamps that go thru the hole to hold it in place. I don't, so i sit on it for 15 minutes ;-) |
 |
 |
When adhesive is set, flip it all over, drill a pilot hole and drop in a straight cut bottom-guided router bit, and cut out the sink! |
|
What I do next is a 1/4 round cove to transition into a tile backsplash. Click here for more info on that process. |
 |
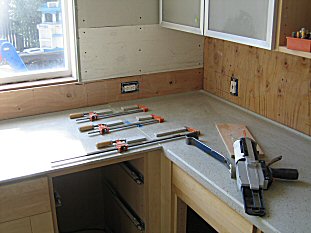 |
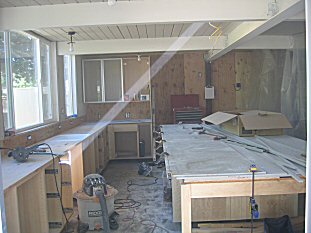
Now we get to seam the individual sheets together. All seams are routed and dry fitted to within a 64th of an inch. Then prepare a 4" strip to mount under the seam (to help support it). Use hot glue to apply the stop blocks we'll use for clamping the seam together. Apply the adhesive, clamp it and let it set up. SHOWN here, we're using 3 clamps to hold the corner seam together. Also, on the right, is the adhesive gun used to apply the glue. SHOWN here are |
|
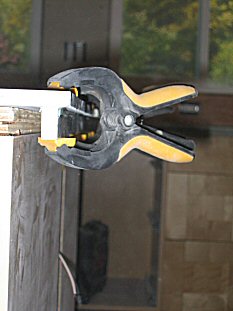
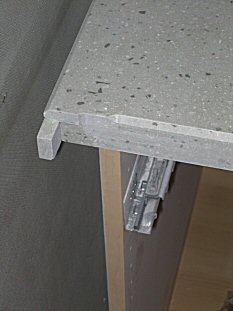
When all sheets are seamed and sanded, the edges are applied. Here's where we use up all those 1" strips we cut a while ago. Cut the strip to length, clean everything with alcohol and set out the clamps. Then apply the glue, set the strip and clamp like mad! The glue sets up a couple of minutes, so you must hustle! |
 |
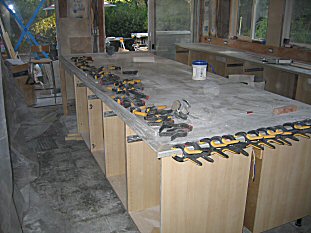 |
Clamp about every 3 inches. |
|
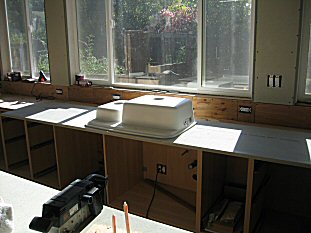
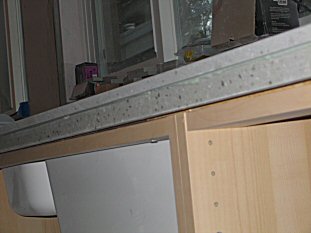
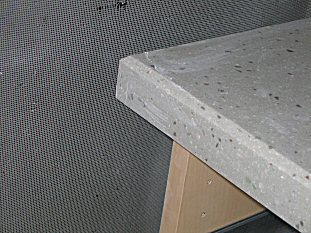
After it's set, remove the clamps and get use a router to finish the edge. Then tent the area and start sanding everything- I hit all surfaces with 150, 220, 320 and 400 grit just to get to a matte finish. Then clean up all the dust and enjoy! |
 |
 |
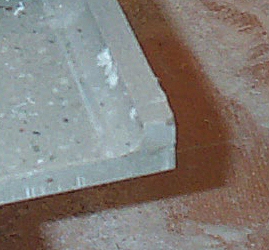
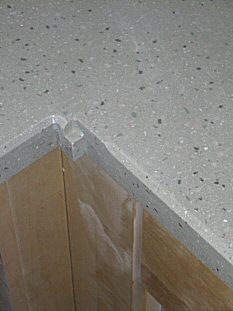
After it's set, remove the clamps and get use a router to finish the edge. Now's the time to do the corner details- use your router and sander to turn this into this! |
 |
 |
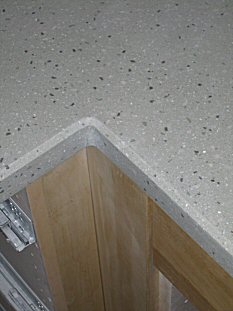
...and this into this! Then tent the area and start sanding everything- I hit all surfaces with 150, 220, 320 and 400 grit just to get to a matte finish. Then clean up all the dust and enjoy! |
 |